What is YouTube
YouTube is a social media that has a large number of users in the world. After Facebook social media, YouTube can be considered as the media that reaches the most people, which means that the amount is approximately 2.2 billion. So how much is it worth to be a part of a social media that has so many users? So let’s see how to create a YouTube channel.
First of all, if you want to create a YouTube channel, you must have a Gmail address. If you currently have a Gmail account, you can use it to create a channel. Here we will see how to start a channel from the point of setting up a new Gmail account.
How to create a Gmail Account
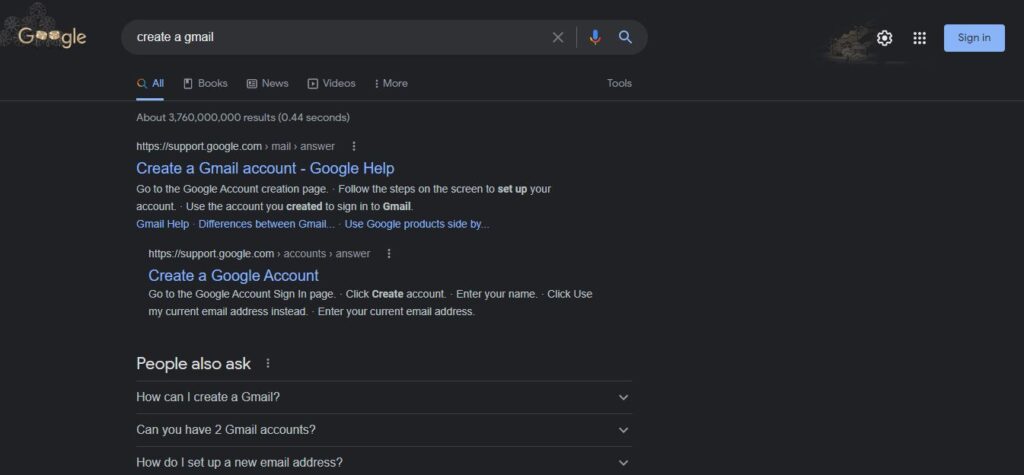
To create a Gmail account, use Google Chrome and search for create a Gmail account. Then on the upper right corner of the relevant page, sign-in is displayed, and click on it.
Then it appears as follows, and here two methods can be followed. The first is to move forward if you have a pre-configured Gmail address. Otherwise, as the second step, you can click create an account here and prepare a new Gmail address and continue.
We will proceed with setting up a new Gmail address for your convenience as promised.
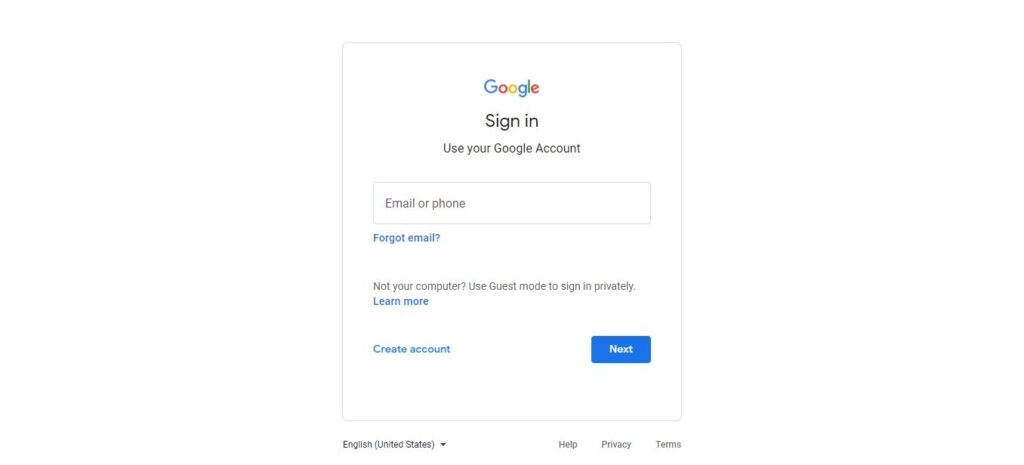
So click on create an account here and let’s prepare an email address first. (It is enough to click on it and set it for myself from the three options that come after.)
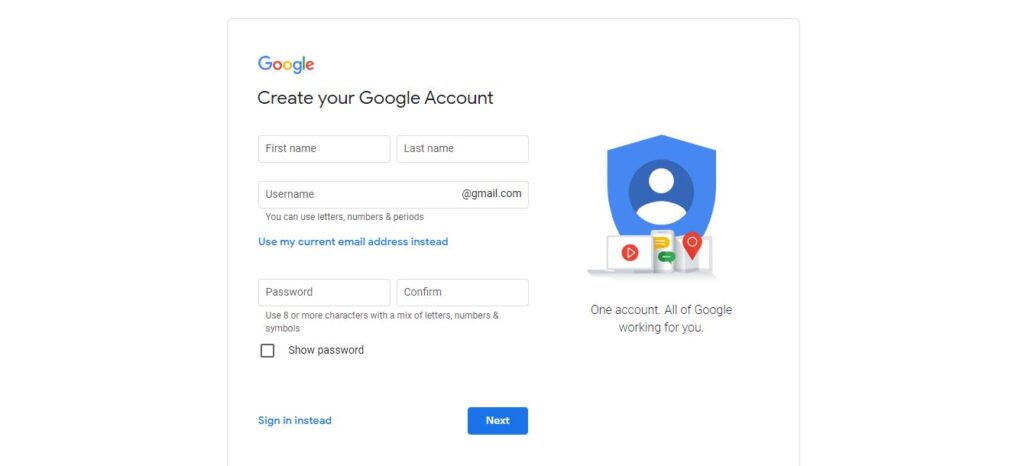
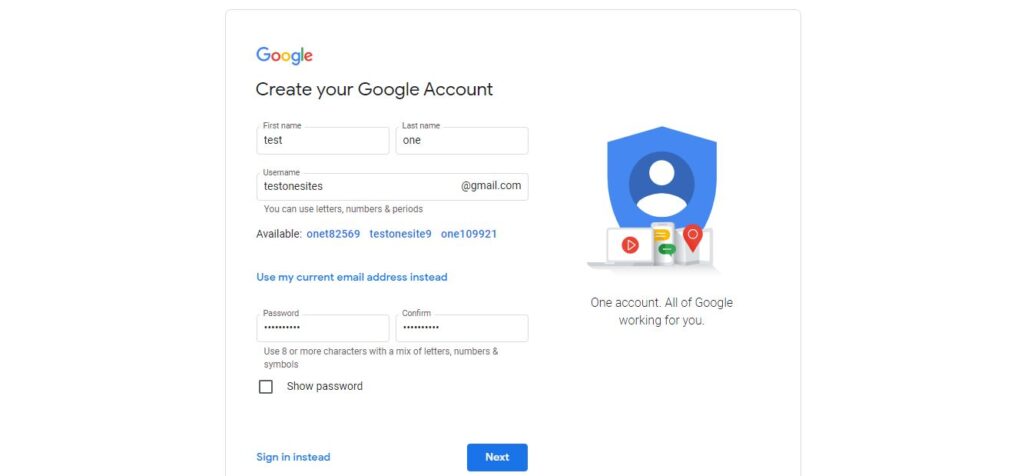
After you click on it and proceed it will look like the below click the next button with first name, last name, the username (required Gmail address), and strong password.
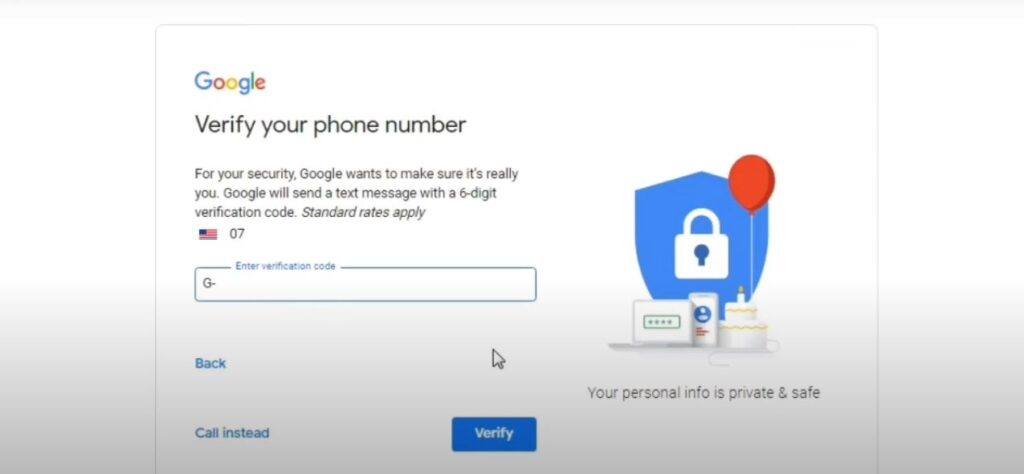
Click next, then move to the next page where you have to enter your phone number and proceed.

Enter the phone number as above and verify. Once it is given you will be taken to the next page. (Your phone number will be confirmed there.) There you can also give yourself a recovery Gmail account. This means that if you are unable to log in to your newly created Gmail account and there is a blockage, you will be able to log in using this recovery Gmail.
Then enter the date of birth and gender in the form below and click next. Then you can see as follows.

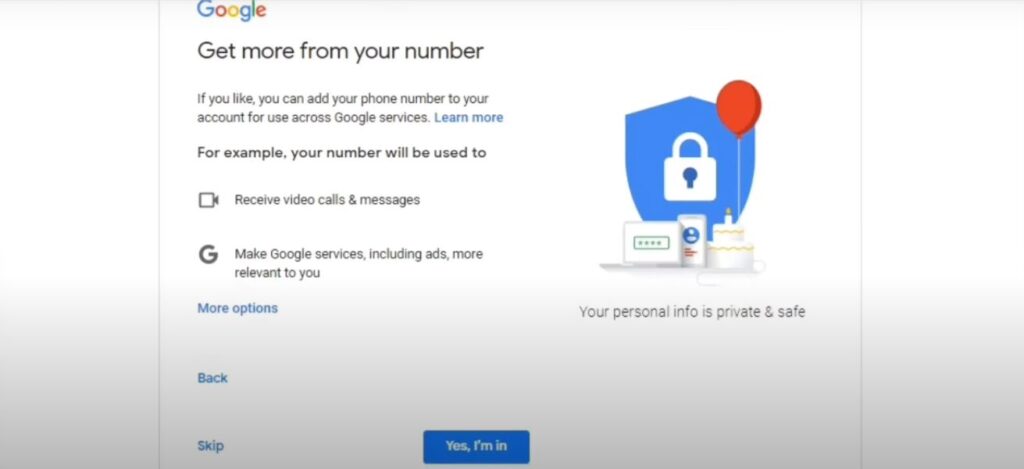
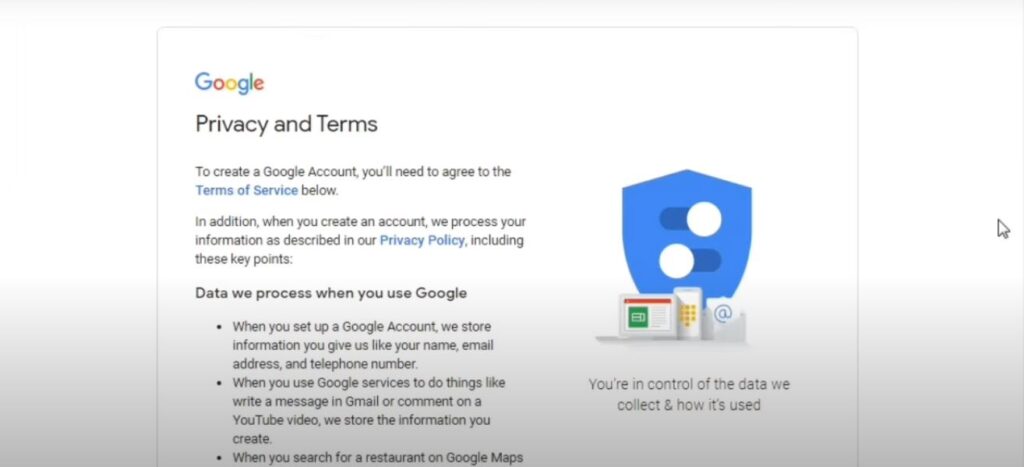
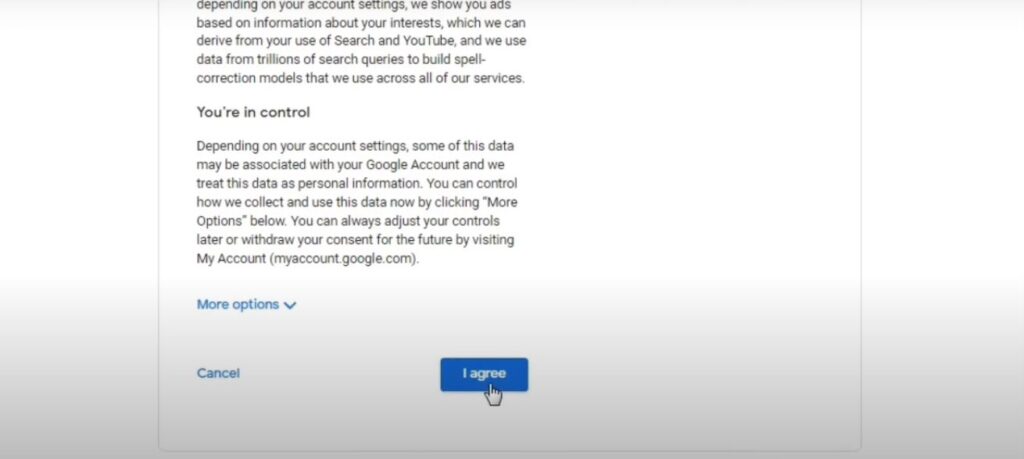
After the above form, click on the one that says “yes I’m in” After clicking on it, the terms and conditions page appears to indicate that you agree to a procedure from Google. Read it and click the “I agree” button at the bottom.
Now a Gmail address is created. If you want to log in to it, you can see the place where you can enter the account by entering the first letter of the email address you have entered, at the top right corner. So now you have successfully completed an email address forever.
Now the main principle of creating a YouTube channel has been implemented. That means an email address is properly configured. So let’s see how to create a YouTube channel.
Let’s start creating the YouTube channel
Now the main principle of creating a YouTube channel has been implemented. That means an email address is properly configured. So let’s see how to create a YouTube channel.
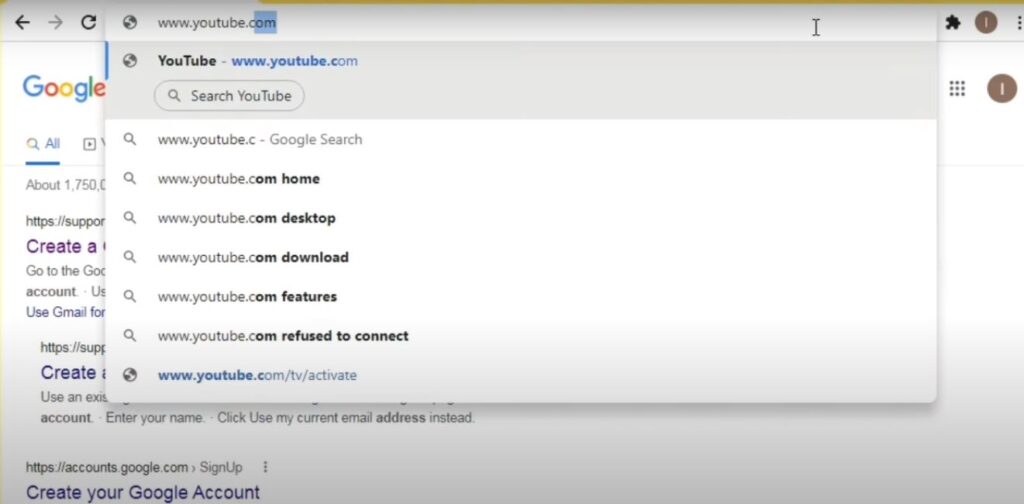
For that, first search for www.youtube.com in the google search engine as above. As mentioned above, after searching www.youtube.com in the google search engine, you need to create a YouTube channel as below, so click Sign in at the top right corner.
If we have not left the account after setting the email address, there is no need to sign in again. Even now it is easy to get into the account.
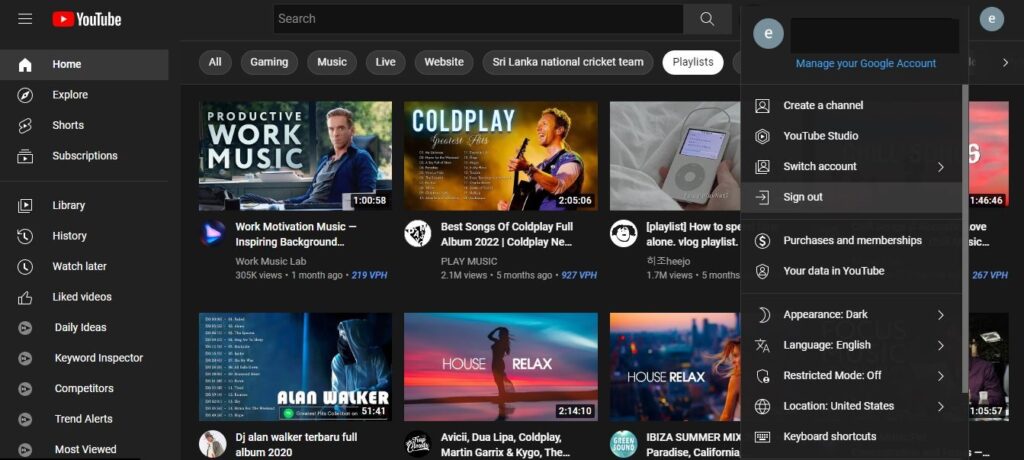
If you want to explain it more, click on the circular I sign in the upper right corner. (NB: Note that this is displayed as the first letter of the name you entered, eg “David” if the email address is set up as “D”.)
So you can click the corresponding “D”. Then you will see a list like below and click on the one that says YouTube studio. After clicking on it, you will have the opportunity to apply a suitable name to your channel as follows. (If you can use a name that matches the videos you expect to publish on the channel, it will be very valuable.)
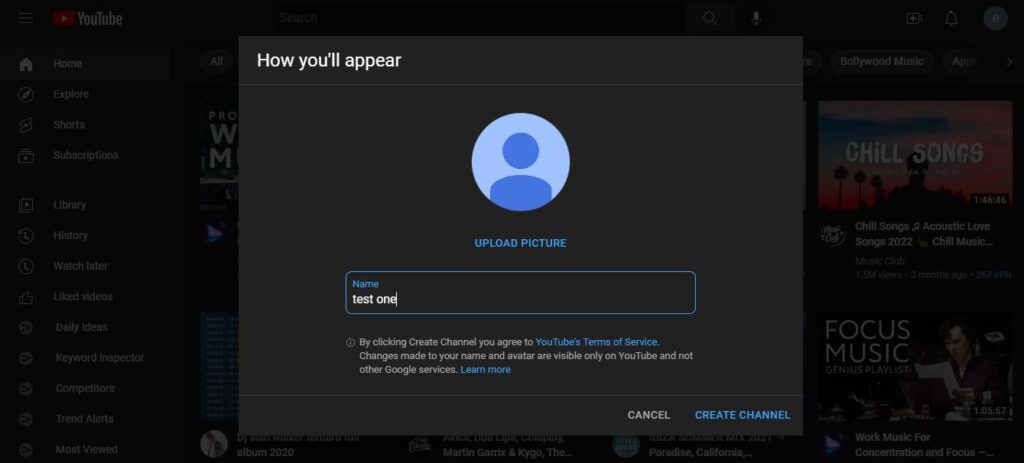
Enter a name that suits you and then click create channel below. After doing that your channel setup will start. Now a channel has been created successfully. But the channel has not been confirmed yet. Let’s see how to do those things step by step.
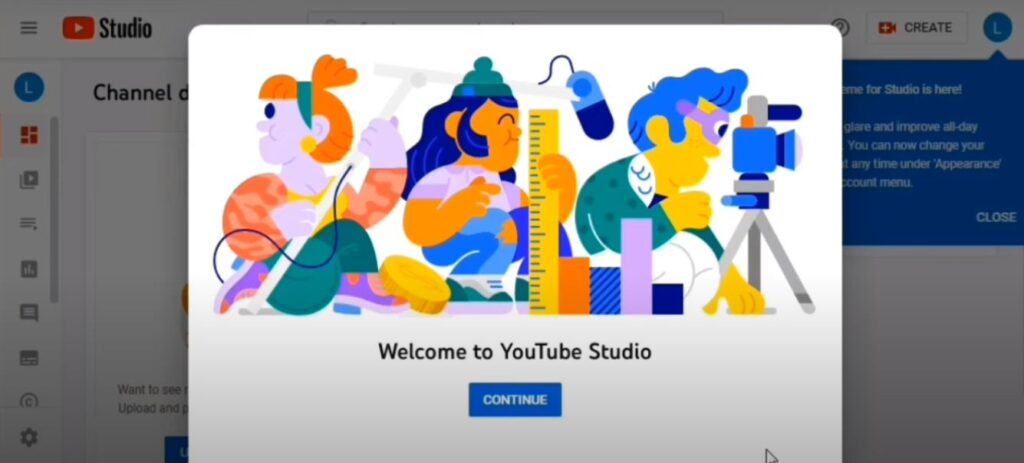
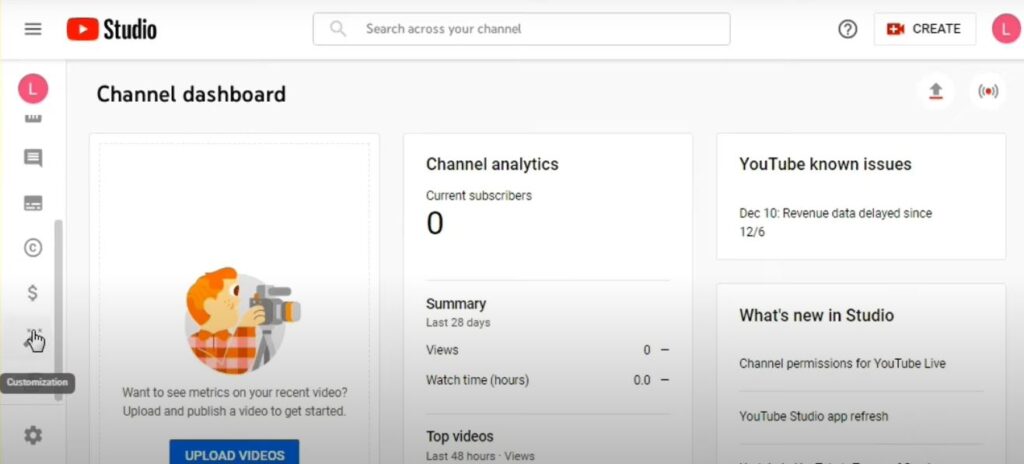
After continuing as mentioned in the image above, you can view the dashboard of your YouTube channel as follows.
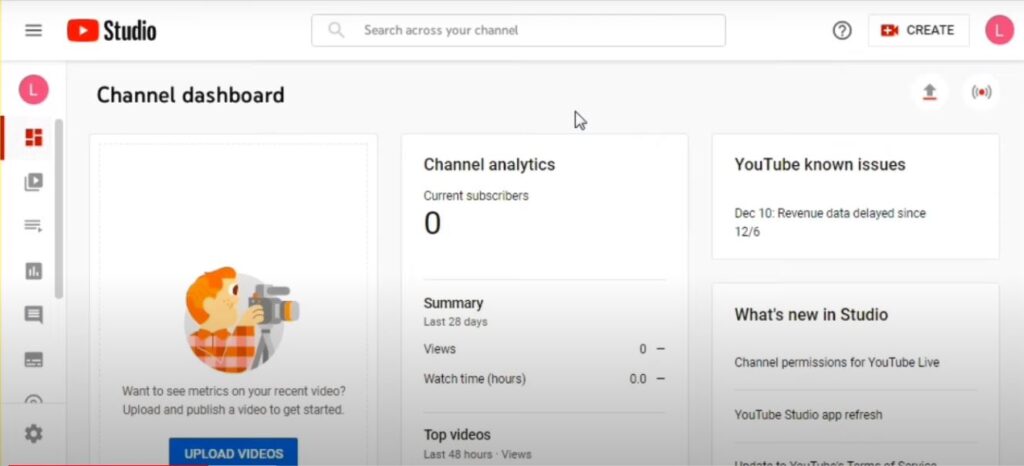
So the YouTube channel we made has not been confirmed yet. (verify) If this verification is not done, we cannot know the thumbnail related to the videos uploaded to YouTube. So let’s verify the channel first.
So, to do the same, click on the sign related to settings at the bottom left corner as shown in the image above.
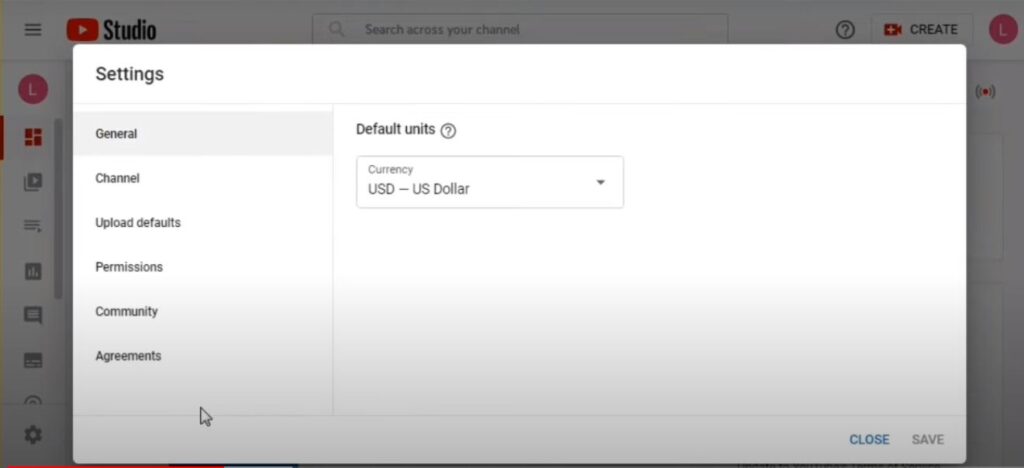
After going to settings, it will show us as above. There, 6 tabs will be shown called general, channel, upload, defaults, permissions, community, and agreements, and click on the second tab called Channel.
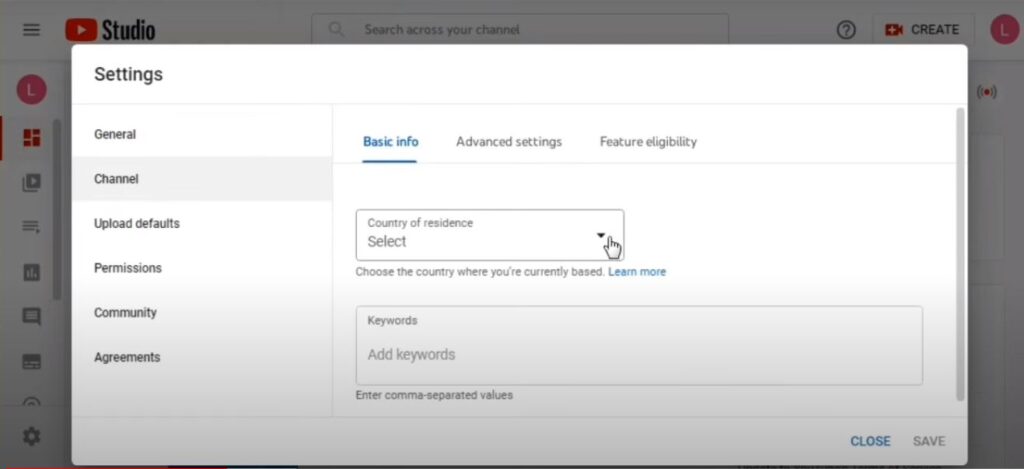
Then you will be able to see the basic info related to your own country. First, you select your country.

After that, you need to give the keywords below. This is a very important part. That is, with the keywords entered here, there is a lot of room for the channel to be indexed with the help of YouTube’s search engine. Therefore, carefully apply the relevant keywords to suit the channel. (Remember, when uploading videos, do not use the same set of keywords for each video.)
If you finish that step using the country and keywords, click advance settings as the next step.
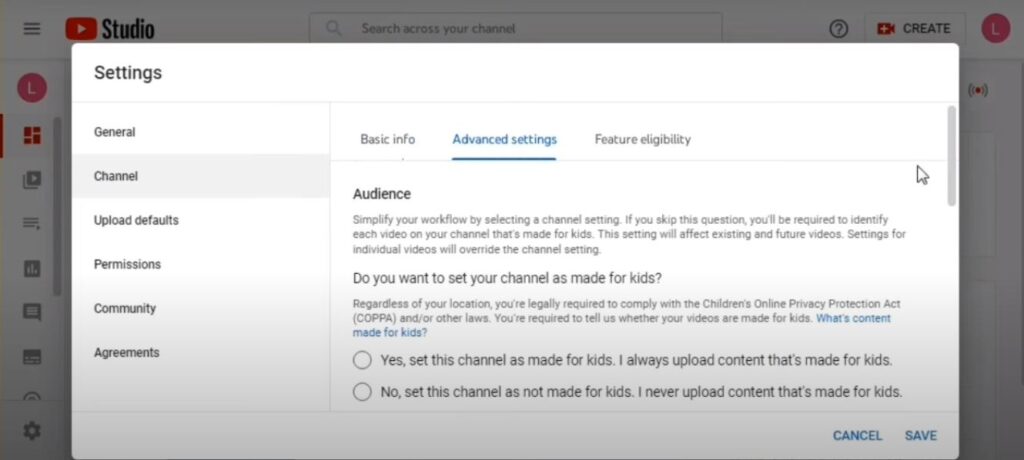
According to the picture above, if you are making the channel for small children, you should set the “I want to review this setting for every video” at the end. If not for small children, you should use the second option.
Choose the option you want and click the save button below. Then all the changes you made above will be saved. After saving, you will go back to the dashboard of the channel. So go back to the settings like you did before. After going to the channel option there, there is features eligibility.
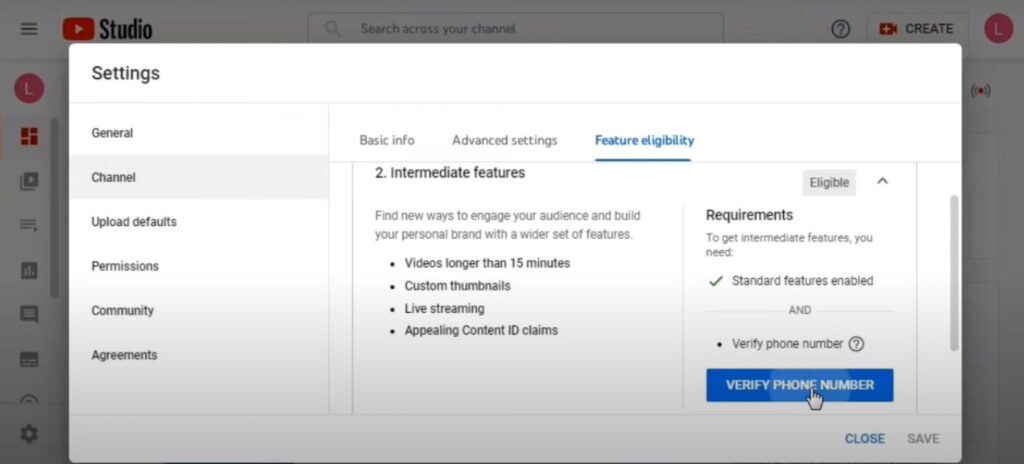
Click Eligible in intermediate features as above. Then you can see below that it says to verify the phone number on a blue background. Click it.
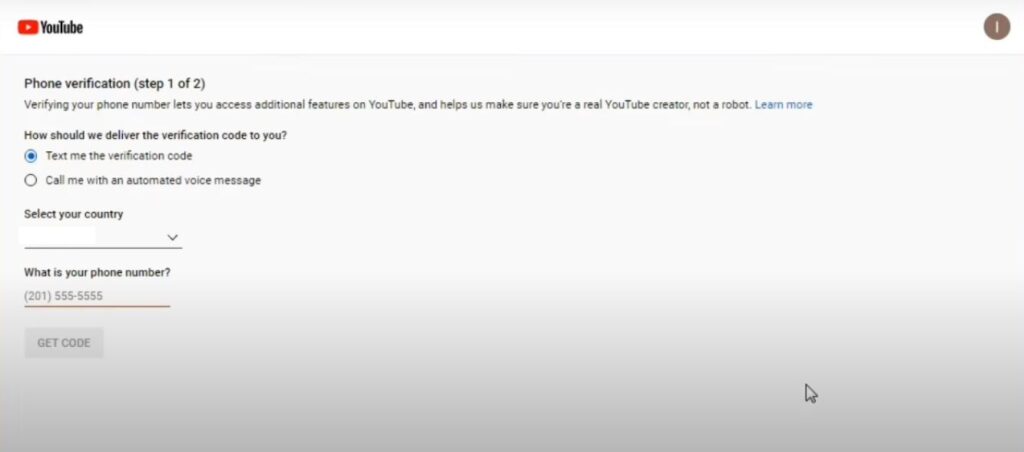
After clicking verify phone number, we will be shown a preview as below. Select your country, enter your phone number and click get code.
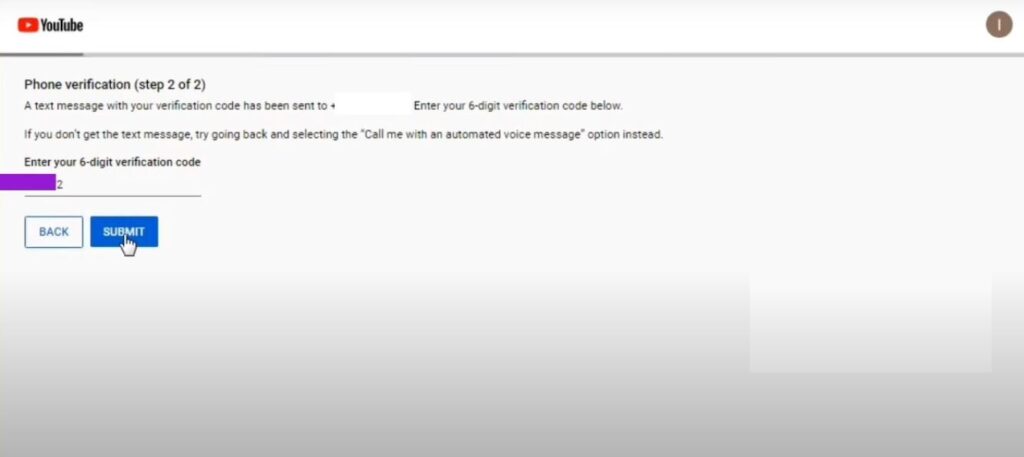
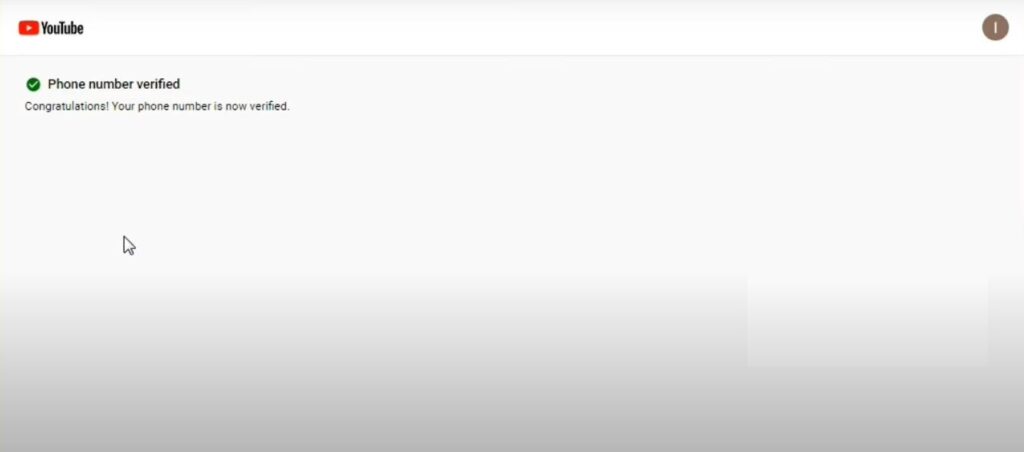
After clicking on getting code, you will receive a six-digit security code to confirm it, and click submit using the received security code.
Now the channel has been successfully verified. It is shown as follows to further prove it.
Now we have completed about 80% of the work on the channel. We still have some simple work to do on the channel. For that, we have to log into the channel’s dashboard again and go to the bottom left, and click on customization, let’s go together and talk about the rest of the work.
So, let’s first see how to add the logo to our channel. For that, first, you need to go to branding as shown in the image below. Then you can see that you are coming to add the logo.

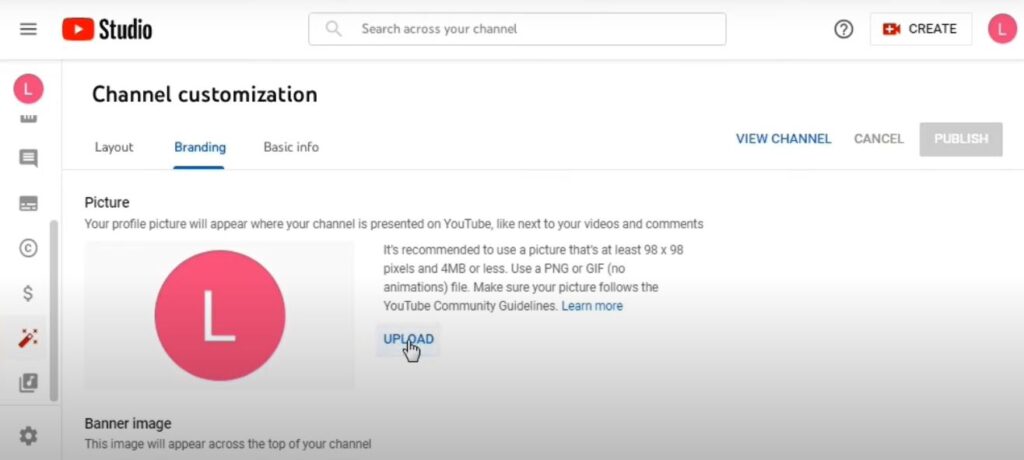
As above, first, upload and add the logo. After that, we can add the banner image. For that, go to the banner image below the logo, click the upload button and upload the relevant image.
Now we have finished uploading the logo and banner image. After that, you will be able to see that there is a publish button at the top right corner. Then both the logo and the banner image will be uploaded to your channel and saved.

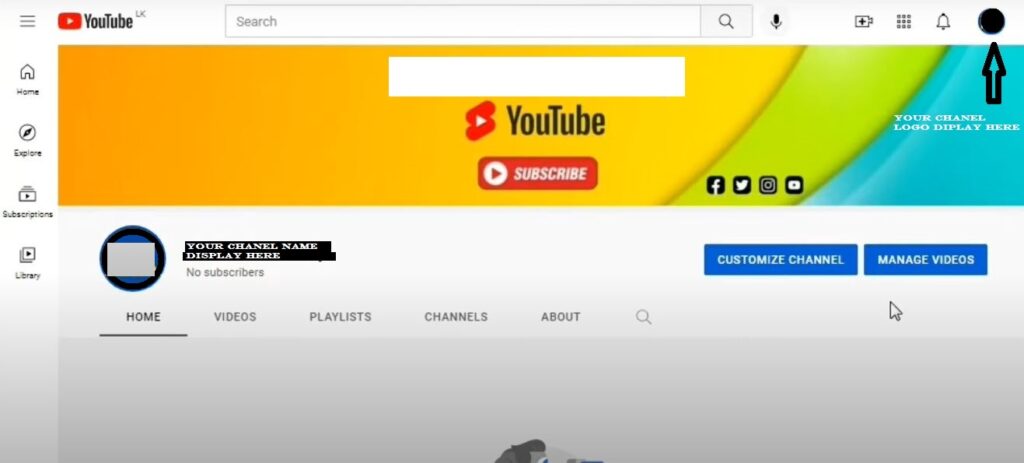
Now we have finished 90% of the channel. So when we go to the channel now, we will show the channel we have created to those who join our channel in the following way.
So now we can start uploading videos to the channel. For that, you will see a sign in the shape of a battery on the upper right, and by clicking on it, we will be able to start uploading videos to the channel. So we think you can create a channel correctly and successfully. You have a chance to win!